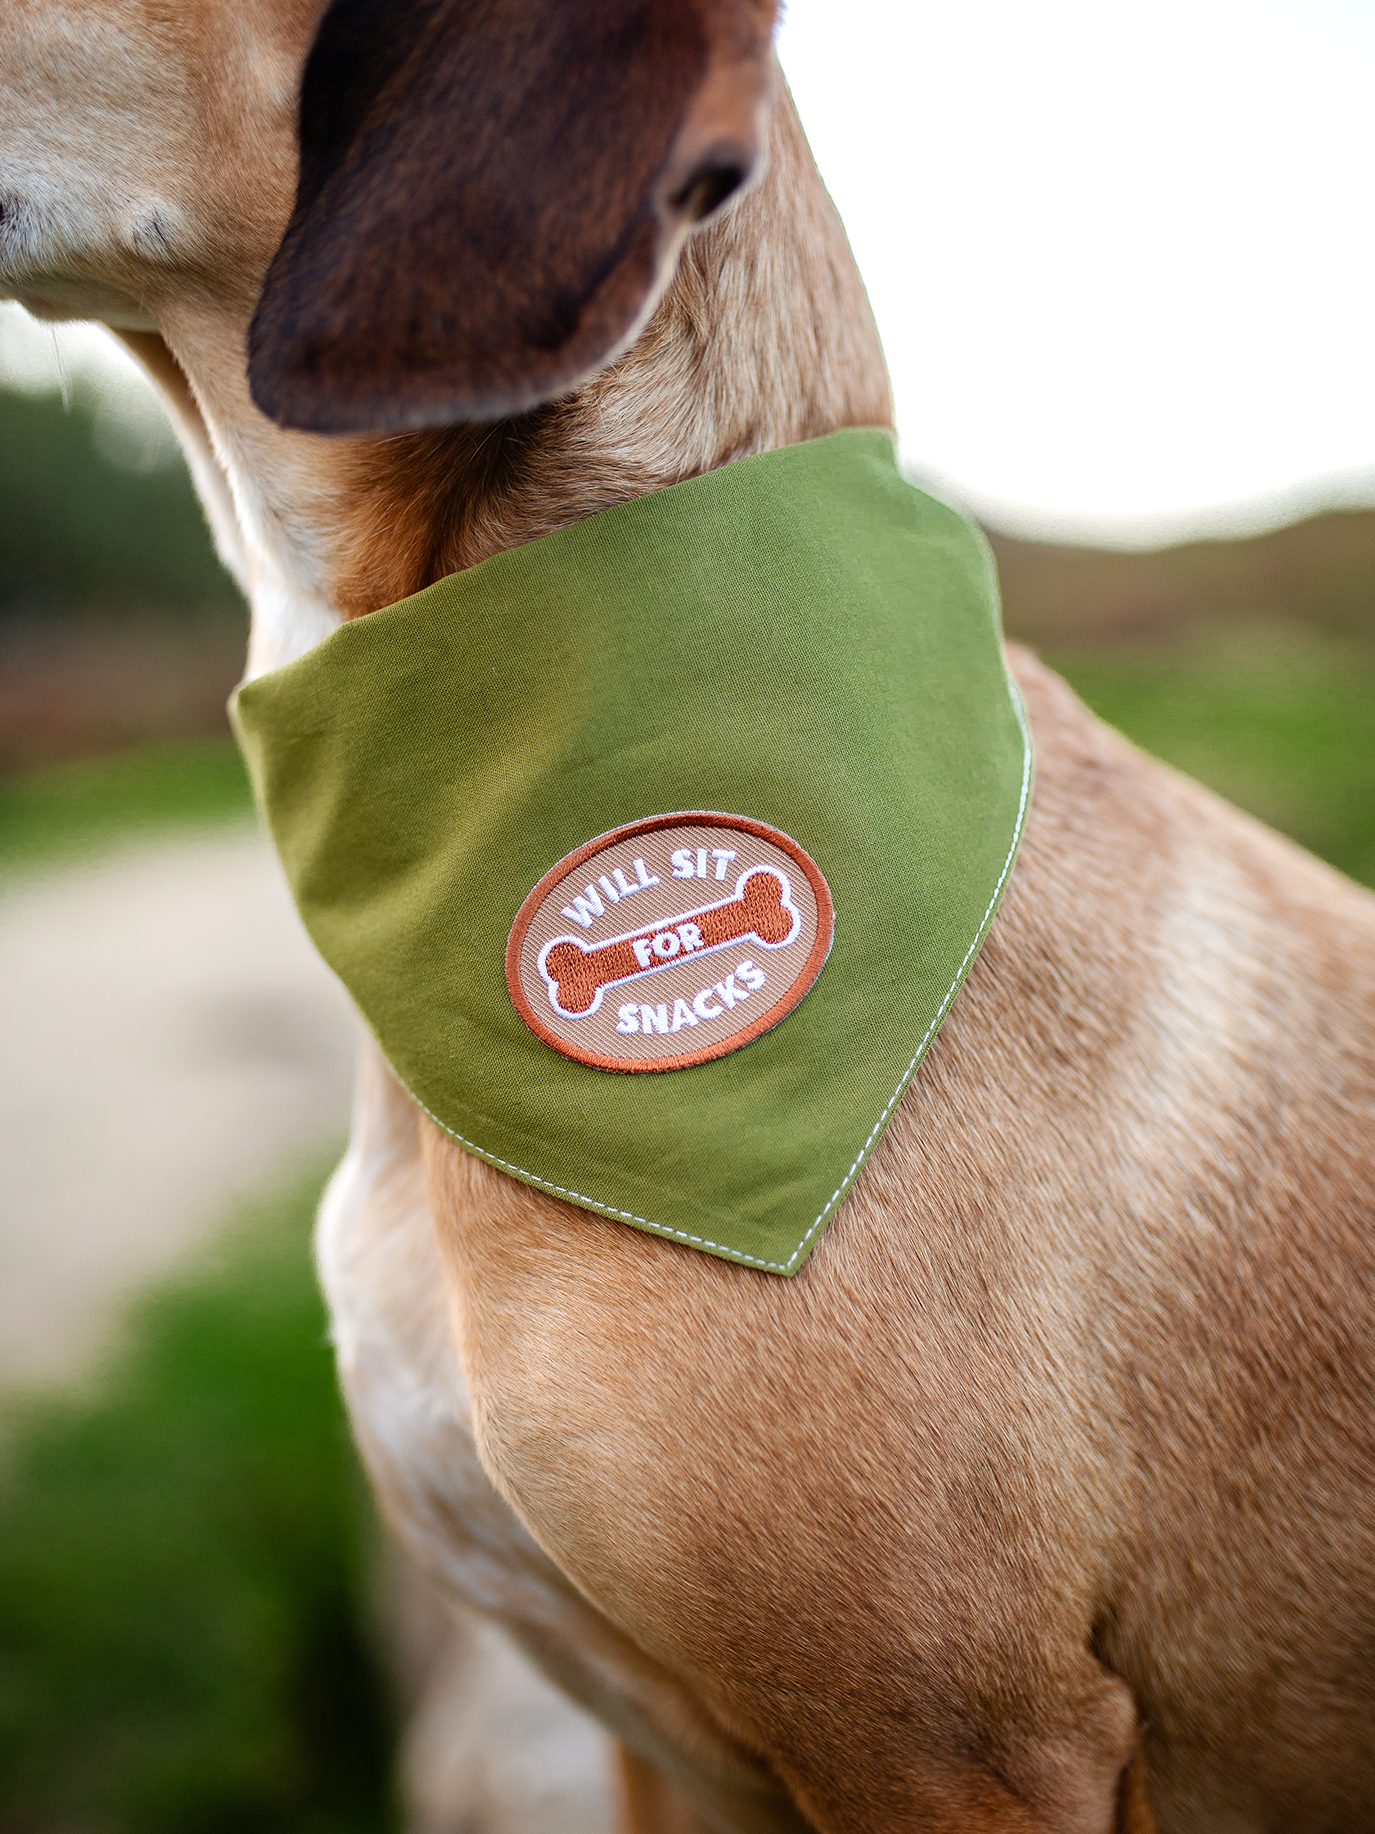
Iron-on patches are a fun and simple way to customise your pet’s gear, clothing, or accessories. Follow these easy steps for a long lasting hold.
What You’ll Need
- An iron
- A thin cloth or towel
- Your iron-on patch
- A heat-safe surface

Step-by-Step: How to Iron-On a Patch
1. Position your patch
Place your patch adhesive-side down on clean, dry fabric where you want it to stick.
2. Cover with a Cloth
Lay a thin cloth or towel over the patch to protect it from direct heat.
3. Iron for 30 Seconds
Set your iron to medium-high heat (no steam). Press firmly for 30 seconds without moving the iron.
4. Let It Cool Completely
Allow the patch to cool fully so the adhesive can set properly.
5. Enjoy Your Customised Pet Accessory
Your patch is ready to show off!

Best Materials for Iron-On Patches
Iron-on patches work best on:
- Cotton
- Denim
- Canvas
- Cotton blends
These fabrics handle heat well and allow the adhesive to bond securely.

Materials That Are Better to Stitch On
Some materials don’t work well with heat and are better sewn on instead:
- Nylon
- Polyester
- Leather or faux leather
- Vinyl
- Waterproof or insulated fabrics
For pet accessories like harnesses, leashes, or collars, stitching is often the most durable option, especially for active dogs.
Pro Tip for Extra Hold
For frequently washed items or high-movement gear, you can iron the patch first, then add a few stitches around the edges for extra security.